# Creating reports
Reports are the core feature of Snapshot. In this section we will explain how to use them.
# Available reports
You will have a number of reports available to fill out at any one time. There are two ways to see all of the available reports.
# All reports page
The first way to see available reports is to visit the "All Reports" page
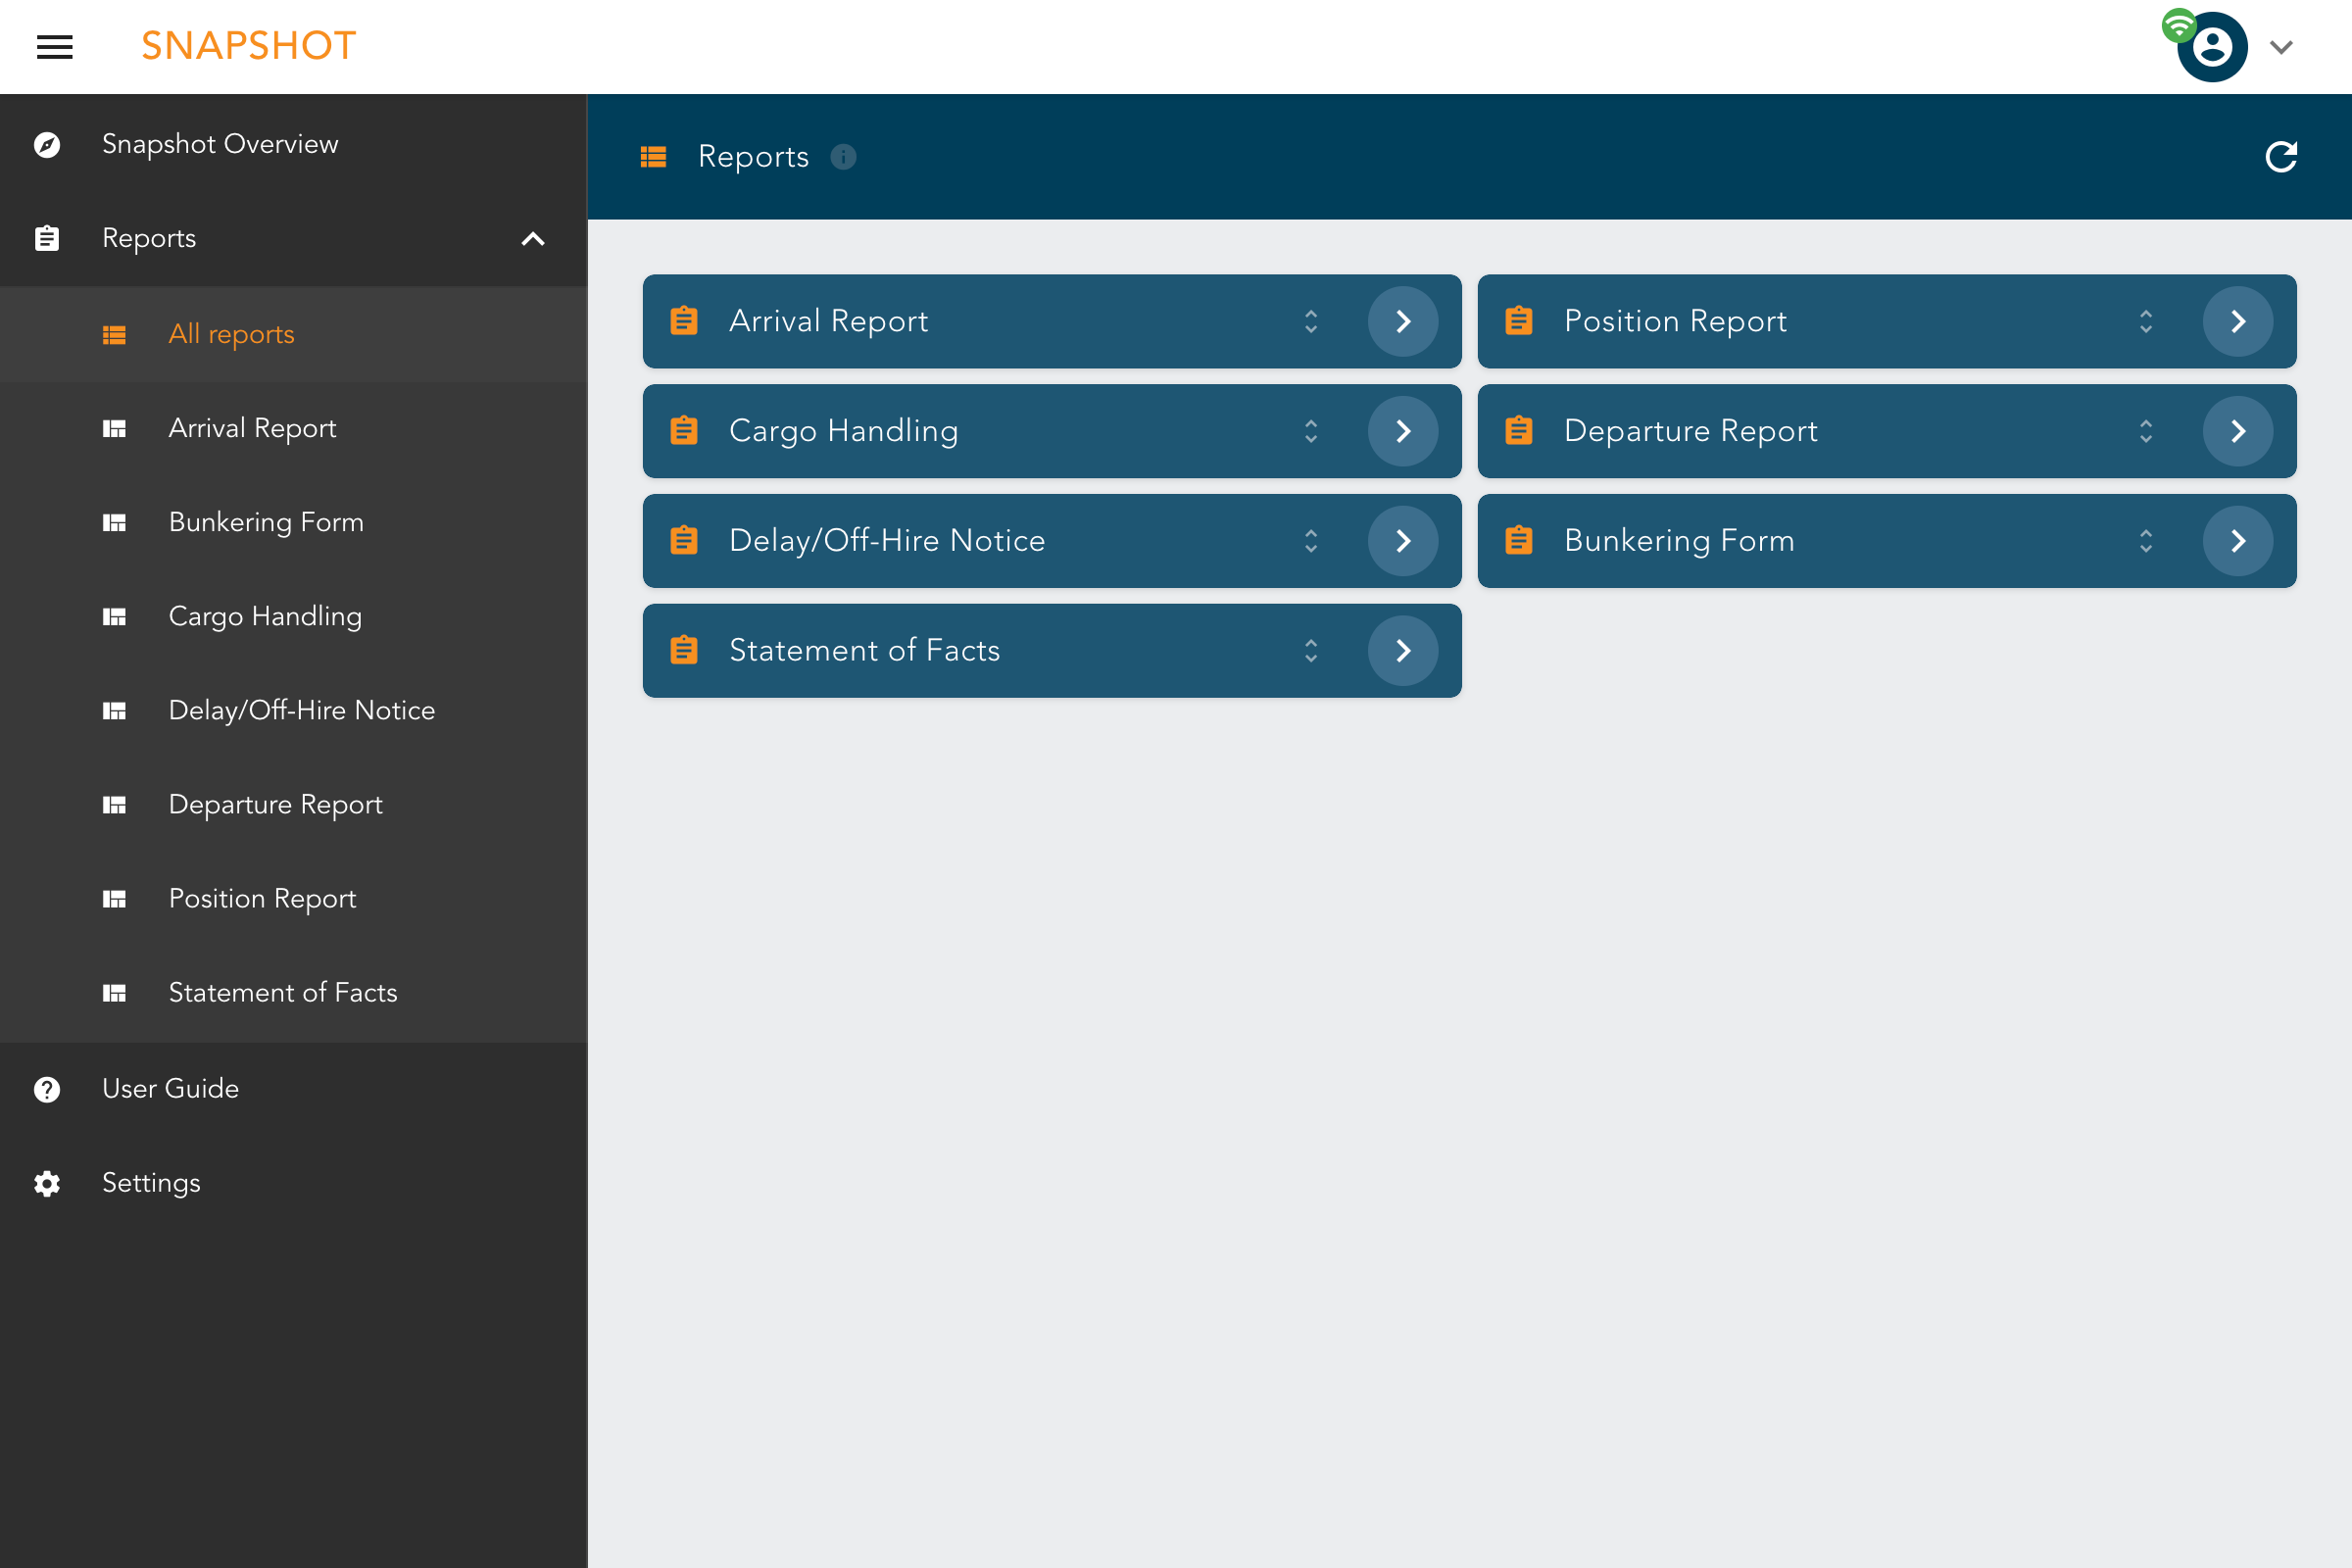
This page displays a list of available reports as tabs. Tabs can be expanded by clicking the more info icon to view details about that report.
Details include:
- The report description
- The report version
- Submission count
- Total submissions
- Completed submissions
- Pending submissions
- Draft submissions
# Navigation sidebar
The second way you can see available reports is by using the navigation sidebar. Clicking the menu icon in the top left of the application will open the navigation sidebar. In here you will find links to all the core areas of the app, as well as link to each report type.
# New report
To start a new report either, click its link in the navigation sidebar, or click on the arrow on the relevant report on the "All Reports" page. You will then be taken to the new report page.
# Setting report date
Before you can begin filling in the report's fields, you must confirm the report date and time.
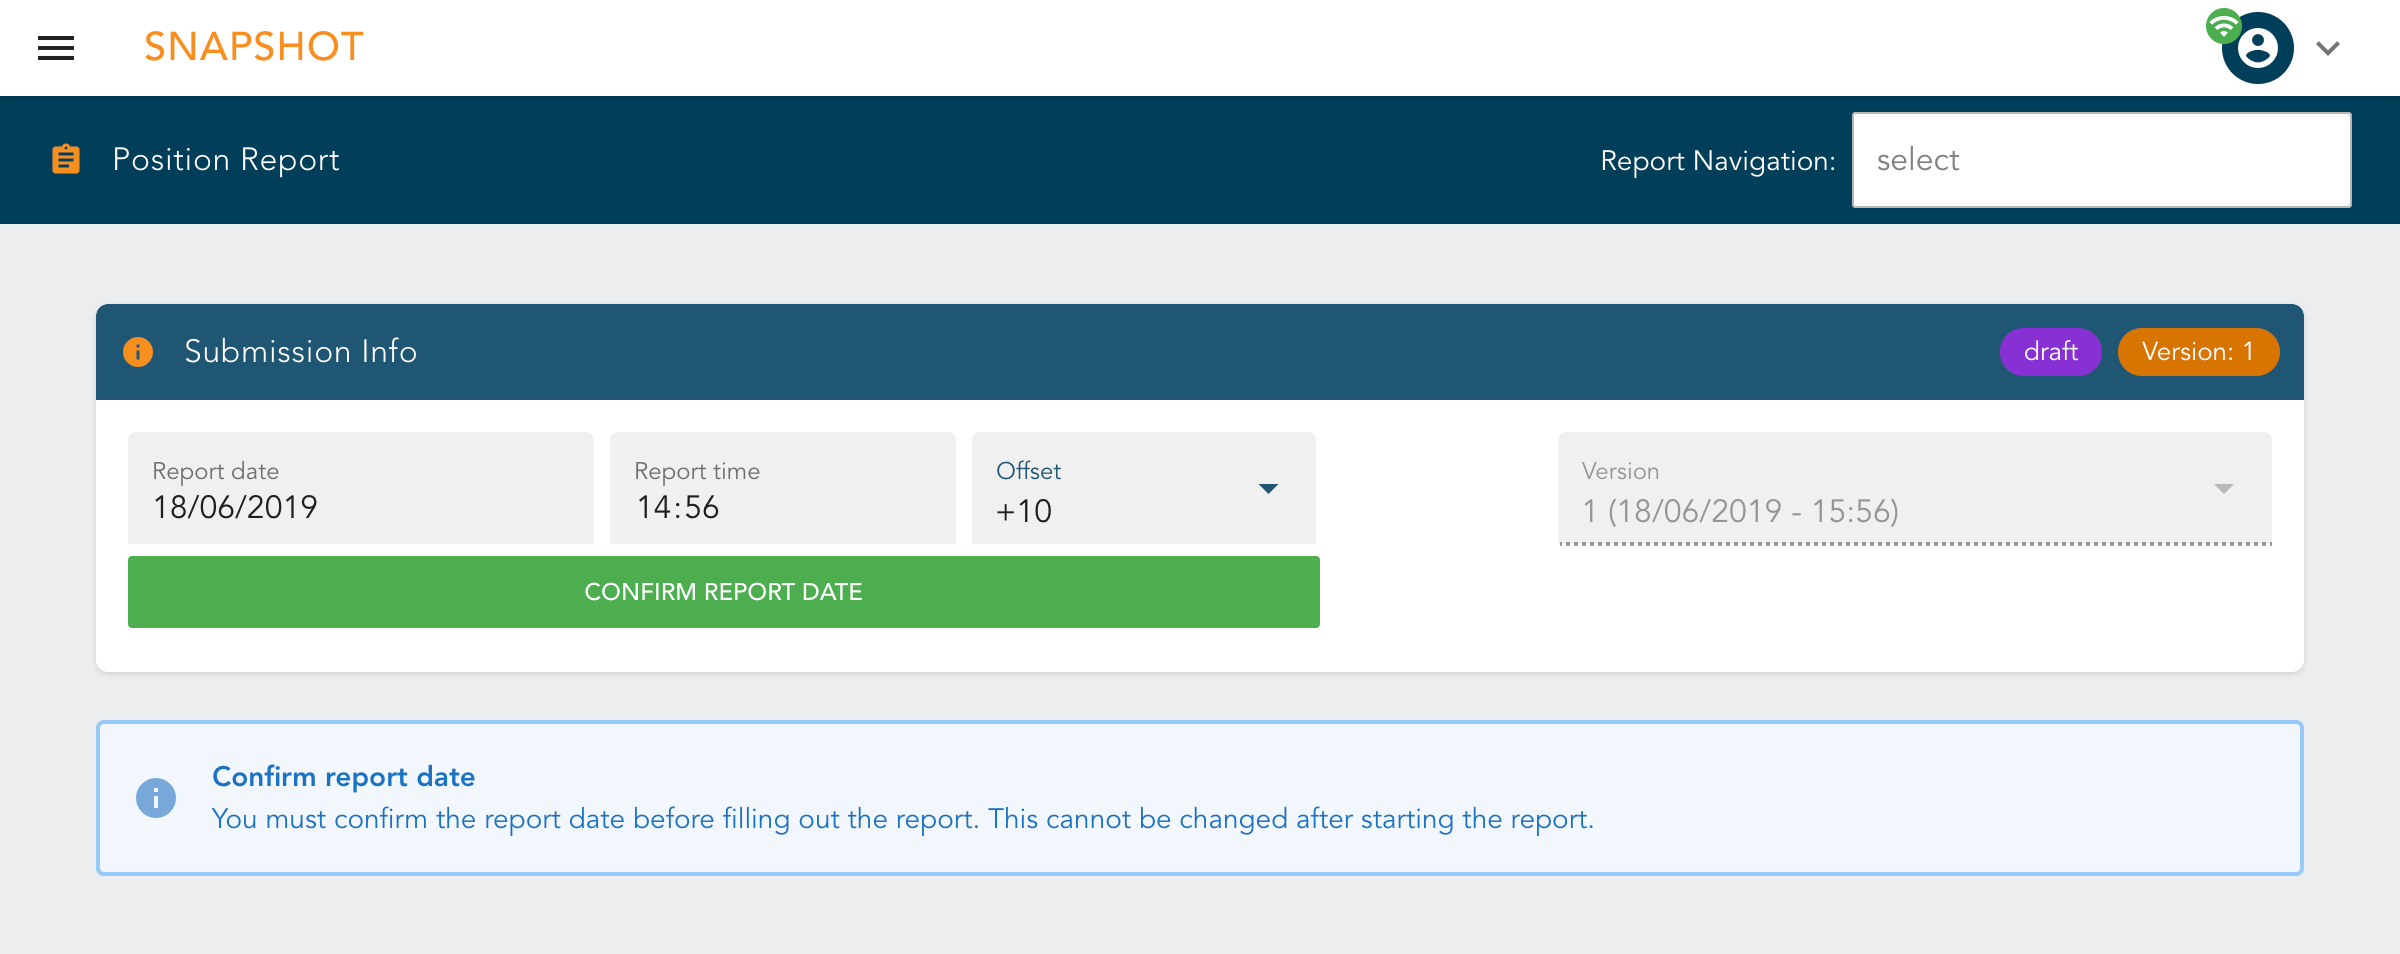
Use the date, time and UTC offset fields to set the date for the report, once you are happy click the Confirm Report Date button. You will see the rest of the form fields become available.
Depending on the report type, the report date may correspond to different real world events. For example in an Arrival report, the report date will correspond to the end of sea passage time.
Changing report date
Changing the report date after starting the submission will cause the fields to be reset. This is because when the date is set Snapshot has to initialise the values of each field with content relevant to selected date. For example the tanks field will be pre-populated with the fuel levels from the report previous to the selected date.
# Entering data
Each report has a number of fields grouped together in logical and related sections. Snapshot contains many different types of fields such as text, number, select boxes, date pickers and more. Each field should be self explanatory to use, and we have tried to choose the most logical field type for each piece of data that needs to be collected.
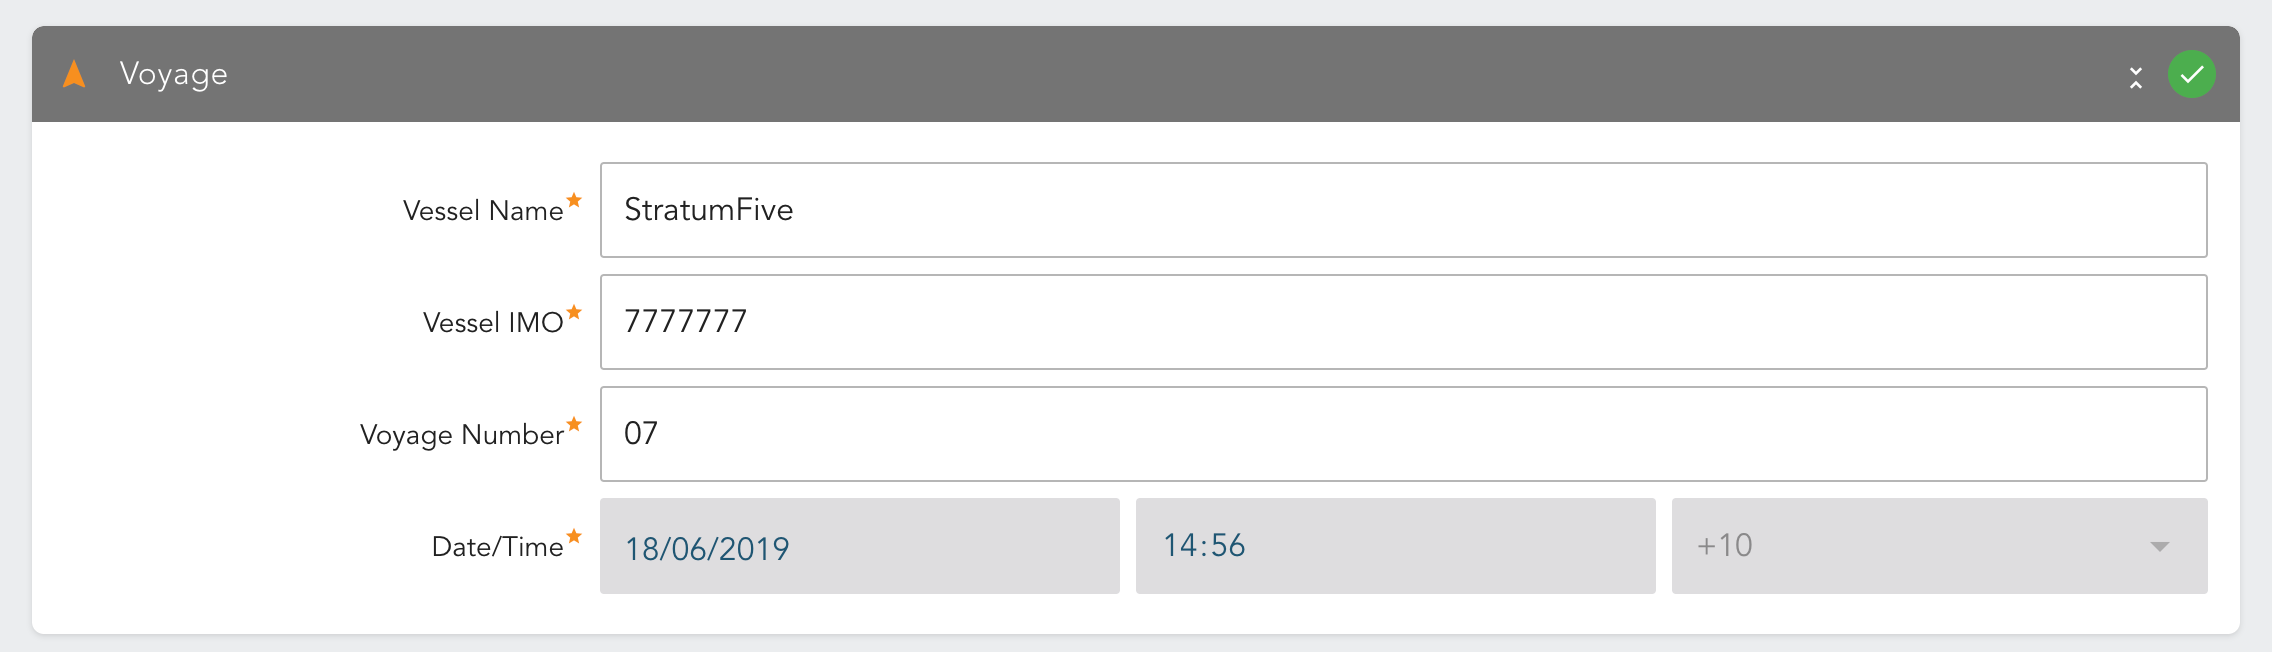
The most common way to complete a report is to start at the top and work your way down the form until all fields have been completed.
# Field validation
While you fill out a report, each field is validated against a set of rules unique to each field.
Field validation will display an informative message detailing the nature of the validation error.

Group validation displays the overall validation status of the fields within the group as a coloured icon at the top right of the group section.

# Validation error levels
There are three levels of validation:
Critical
Shown in red on fields and field groups. Critical errors highlight where a correction is needed. Reports cannot be submitted if there are critical errors.
Warning
Shown in yellow on fields and field groups. Warnings highlight where a correction could be needed. Reports can still be submitted if there are warning errors. Warning errors are also listed at the bottom of the form before you submit the report.
OK
Shown in green on field groups. This indicates that all fields within the group are valid. If all groups show green then a report can be submitted
# Workflow validation
Snapshot also implements a second type of validation that we call "Workflow validation". Workflow validation exists to help make sure mistakes between reports are not made.
A single report can be filled out with data that is perfectly valid on its own, but when considered in the context of previous submissions and other information we have it may not make sense.
Here are a few example issues that workflow validation aims to prevent:
- Missing position reports (There should be one per day)
- Missing arrival reports. When a departure report is started without the existence of a matching arrival an error will be displayed.
- Missing departure reports, when the vessel changes from being in port to at see and there is no departure report and error will be displayed.
Workflow validation presents itself as an error dialog when one of the validation rules is triggered:
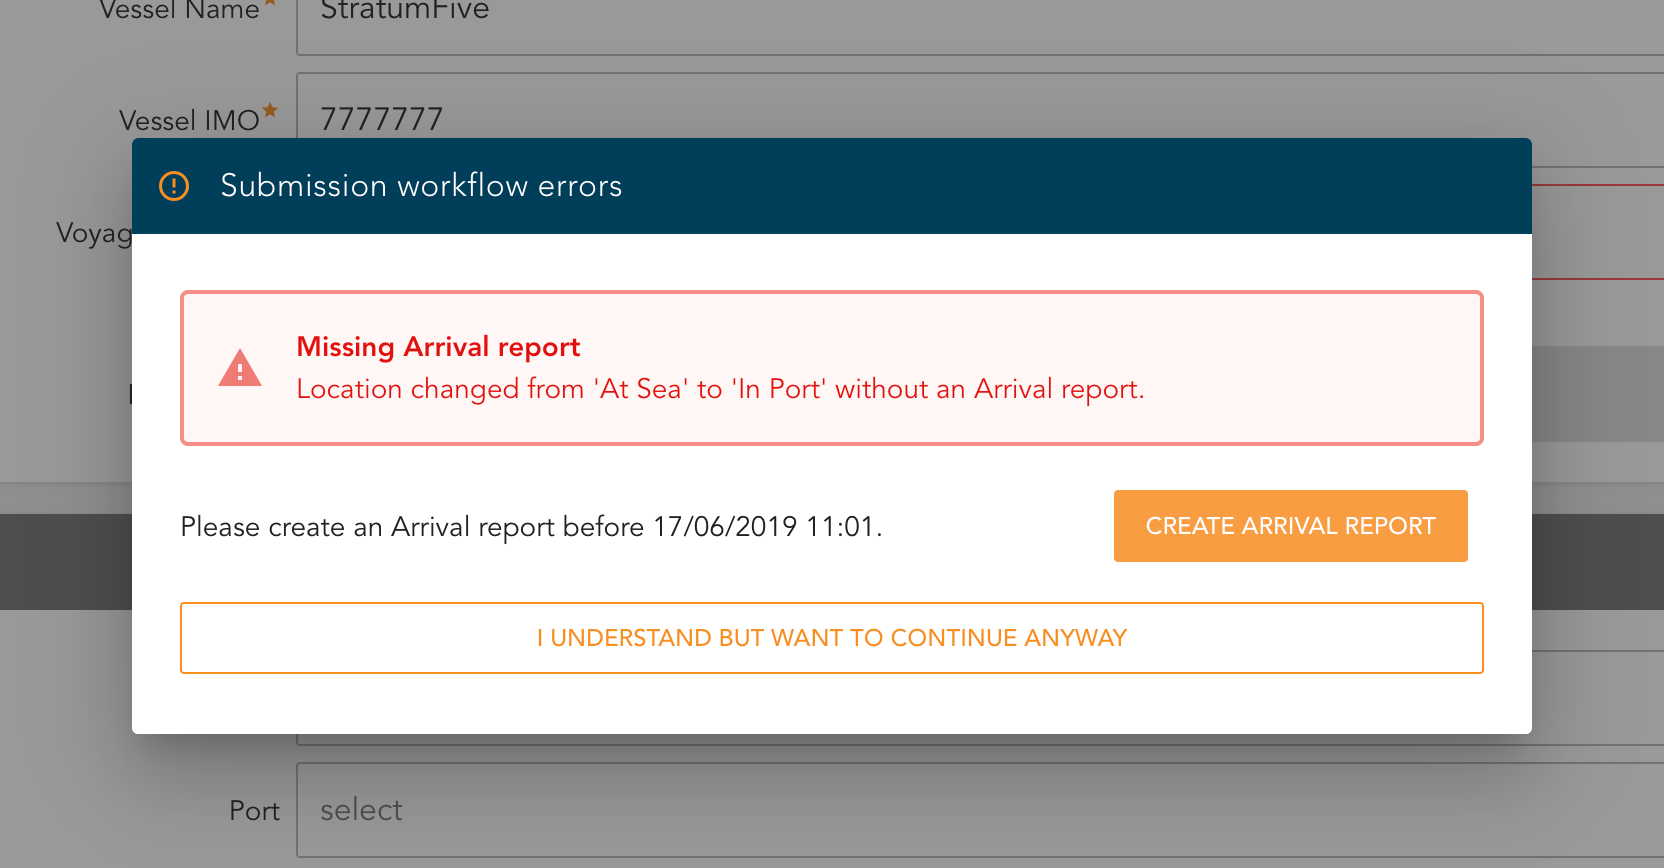
The dialog will explain the issue, and offer a quick link to resolve it by creating the relevant report.
You can choose to dismiss the error, as you may have a legitimate reason for creating the report with the error.
# Submitting a report
The submit appears at the bottom of the report. If a report is valid it can be submitted.
Clicking the submit button will attempt to submit the report. You will then be redirected to the Snapshot Overview screen where you should see your new report in the list of submissions.
Submission States
Submissions can be in one of three states:
- Completed - The submission was sent successfully
- Pending - The submission is pending. This occurs when the application is offline and the application is unable to send the submission. The app will periodically attempt to re-send the submission in the background. If successful the submission will be tagged as Completed.
- Draft - The submission has been saved to be filled in later.
# Saving a draft
If you are not ready to submit are report but have filled in some of the data you can save a draft. The Save draft button appears at the bottom of the report next to the submit button.
Clicking the Save draft button will save the report as a Draft. You will then be taken to the Snapshot Overview screen where you should see your draft in the list of submissions.
# Editing a draft report
To view and update a draft report:
- Navigate to the
Snapshot Overviewpage - Find the report in the submissions list. It's status will be marked as
draft - Click its title to open the report
The draft will open in the report view containing all the saved data, ready to be updated and submitted.
Clicking submit will attempt to submit the draft report.
# Collaborating on reports
Master's and their crew can now collaborate to fill in parts of the submission that are relevant to them. For example, the Master on the Bridge may fill out most of a report, while the engineer in the engine room completes the sections relevant to them.
To do this follow this example process:
- The Master or Bridge should create a new report and begin filling out the information relevant to them.
- They should then save the partially filled out report as a draft with the
Save draftbutton. - From the engine room, the engineer should also log into Snapshot from an available computer. After Snapshot synchronises they will see the draft report created by the bridge. They should open the report and fill out the parts relevant to them. This could include ROB and consumption values.
- Once they are finished adding their data, they should again save a draft with the
Save draftbutton. - The updated draft will be synchronised back to the Bridge automatically. The Master can then double-check the data in the submission, fill out any remaining fields, and finally submit the report with the
Submit reportbutton.
Internet connectivity
Draft submissions will only be synchronised between computers if both computers have internet connectivity.